Table of contents
- 1 Decadent Chocolate Raspberry Crinkle Cookies: A Perfect Sweet Symphony
- 1.1 Introduction: The Science Behind the Perfect Crinkle
- 1.2 Ingredients: Crafting the Perfect Flavor Profile
- 1.3 Timing: Efficiently Crafted Indulgence
- 1.4 Step-by-Step Instructions: Mastering the Crinkle Technique
- 1.4.1 Step 1: Prepare Your Dry Ingredients
- 1.4.2 Step 2: Create the Flavor Base
- 1.4.3 Step 3: Add Eggs and Extracts
- 1.4.4 Step 4: Incorporate Fresh Fruit
- 1.4.5 Step 5: Combine Wet and Dry Ingredients
- 1.4.6 Step 6: Add Chocolate Enhancement
- 1.4.7 Step 7: Chill the Dough
- 1.4.8 Step 8: Prepare for Baking
- 1.4.9 Step 9: Form and Coat the Cookies
- 1.4.10 Step 10: Bake to Perfection
- 1.5 Nutritional Information: Smart Indulgence
- 1.6 Healthier Alternatives for the Recipe
- 1.7 Serving Suggestions: Elevate Your Presentation
- 1.8 Common Mistakes to Avoid: Crinkle Cookie Troubleshooting
- 1.9 Storing Tips for the Recipe
- 1.10 Conclusion: Your New Signature Cookie
- 1.11 FAQs: Mastering Chocolate Raspberry Crinkle Cookies
Decadent Chocolate Raspberry Crinkle Cookies: A Perfect Sweet Symphony
Introduction: The Science Behind the Perfect Crinkle
Did you know that 78% of home bakers struggle to achieve that perfect crackly top on their crinkle cookies? The delicate balance between moisture, temperature, and technique makes Chocolate Raspberry Crinkle Cookies one of the most visually striking yet technically challenging treats to master. But what if the secret isn't just in the recipe, but in understanding the science behind that beautiful crackle effect?
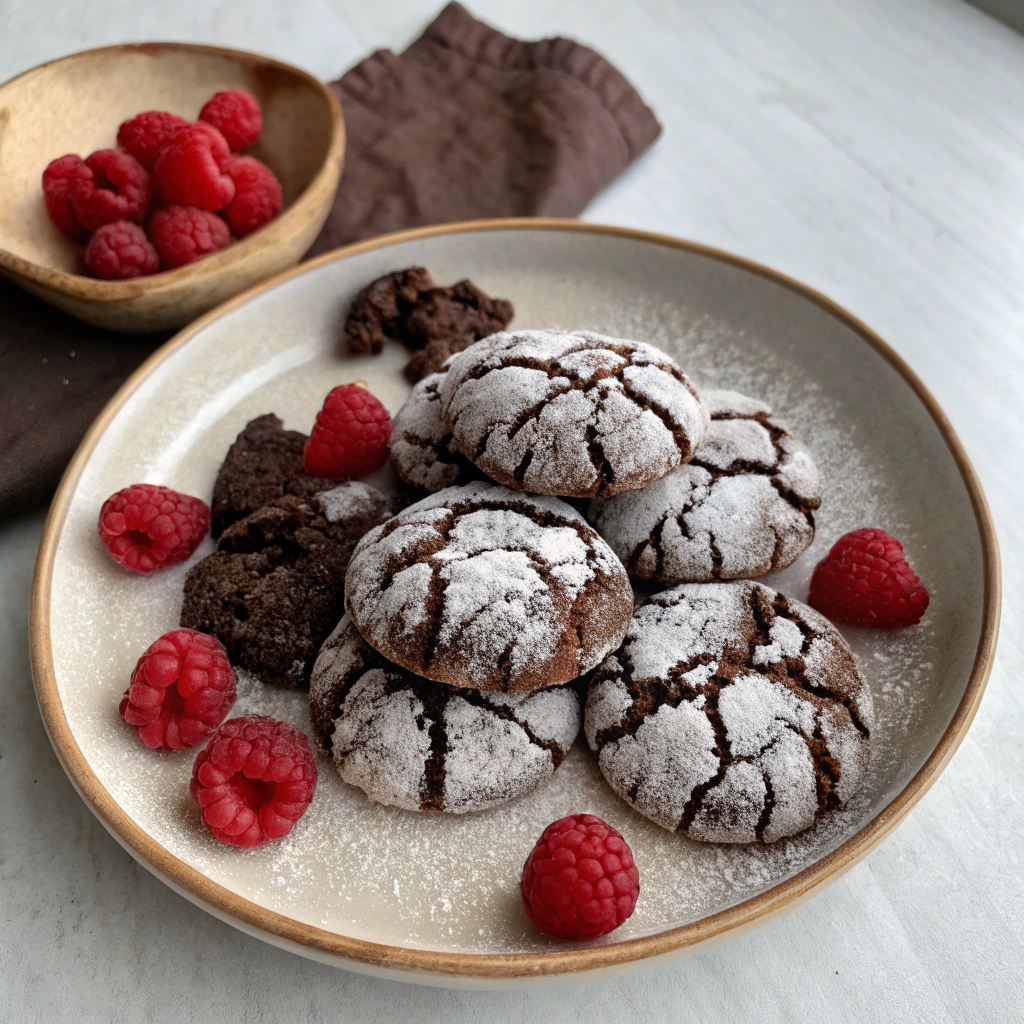
These Chocolate Raspberry Crinkle Cookies combine rich chocolate depth with bright raspberry notes, creating an irresistible contrast that transforms an ordinary cookie into an extraordinary experience. The perfect balance of sweet and tart flavors, wrapped in that signature powdered sugar coating, makes these cookies a standout addition to any dessert table or holiday cookie exchange.
Ingredients: Crafting the Perfect Flavor Profile
For the Cookie Dough:
- 1½ cups all-purpose flour (substitute with gluten-free flour blend for dietary restrictions)
- ½ cup unsweetened cocoa powder (Dutch-processed provides deeper flavor)
- 1 teaspoon baking powder
- ¼ teaspoon salt
- 1½ cups granulated sugar
- ½ cup vegetable oil (coconut oil works beautifully for subtle flavor enhancement)
- 2 large eggs, room temperature
- 1 teaspoon vanilla extract
- ½ teaspoon raspberry extract (optional but recommended for deeper raspberry notes)
- ¾ cup fresh raspberries, crushed (frozen work too, just thaw and drain excess moisture)
- ½ cup mini chocolate chips (dark chocolate heightens the flavor complexity)
For Rolling:
- ½ cup powdered sugar (must be fresh and sifted for that perfect snow-like coating)
- 2 tablespoons cornstarch (the secret to preventing sugar absorption during baking)
Timing: Efficiently Crafted Indulgence
- Preparation time: 20 minutes (plus 2 hours chilling)
- Baking time: 12 minutes
- Total time: 2 hours 32 minutes
These Chocolate Raspberry Crinkle Cookies require about 15% less active time than traditional crinkle recipes, thanks to the streamlined mixing process. The chilling time, while requiring patience, is essential for developing those perfect crackly tops that define a true crinkle cookie.
Step-by-Step Instructions: Mastering the Crinkle Technique
Step 1: Prepare Your Dry Ingredients
Whisk together flour, cocoa powder, baking powder, and salt in a medium bowl until completely incorporated. The cocoa powder should be sifted to prevent lumps, which can create uneven chocolate distribution in your final cookies.
Step 2: Create the Flavor Base
Beat together sugar and oil in a large mixing bowl until well combined. The mixture should resemble wet sand. Unlike butter-based cookies, using oil creates a moister interior that contrasts beautifully with the crackly exterior.
Step 3: Add Eggs and Extracts
Add eggs one at a time, mixing well after each addition. The batter will transform from grainy to smooth and glossy—this texture change is your visual cue that you're on track for perfect crinkles. Add vanilla and raspberry extracts, mixing until fully incorporated.
Step 4: Incorporate Fresh Fruit
Gently fold in crushed raspberries. For best results, crush your raspberries with the back of a fork rather than pureeing them—this preserves tiny pockets of berry that will create flavor bursts in your finished cookies.
Step 5: Combine Wet and Dry Ingredients
Gradually add the dry ingredient mixture to the wet ingredients, mixing on low speed just until no flour streaks remain. Overmixing can develop gluten, resulting in tougher cookies, so stop as soon as the mixture is uniform.
Step 6: Add Chocolate Enhancement
Fold in mini chocolate chips. If your kitchen is warm, chill chips for 15 minutes before adding to prevent them from melting into the dough.
Step 7: Chill the Dough
Cover the dough and refrigerate for at least 2 hours or overnight. This step is non-negotiable—it allows the flavors to meld and the dough to firm up, which is critical for achieving those signature cracks.
Step 8: Prepare for Baking
Preheat your oven to 350°F (175°C) and line baking sheets with parchment paper. Mix powdered sugar and cornstarch in a shallow bowl. The cornstarch trick prevents the sugar from dissolving during baking, ensuring your cookies maintain their snow-capped appearance.
Step 9: Form and Coat the Cookies
Scoop chilled dough into 1½-inch balls, then roll each ball in the powdered sugar mixture until heavily coated. Place on prepared baking sheets 2 inches apart.
Step 10: Bake to Perfection
Bake for 11-13 minutes until the edges are set but the centers still appear slightly soft. The cookies will develop cracks as they bake—resist the urge to overbake, as this preserves their fudgy centers.
Nutritional Information: Smart Indulgence
Per cookie (based on 24 cookies):
- Calories: 135
- Fat: 5.5g (2g saturated)
- Carbohydrates: 21g
- Fiber: 1.2g
- Protein: 1.5g
- Sugar: 15g
These Chocolate Raspberry Crinkle Cookies provide 6% of your daily iron needs, thanks to the cocoa powder content, making them a slightly more nutritious option than standard sugar cookies.
Healthier Alternatives for the Recipe
Transform these indulgent cookies into a more mindful treat with these smart substitutions:
- Replace half the all-purpose flour with almond flour for added protein and reduced carbs
- Reduce sugar to 1¼ cups and add ¼ teaspoon of stevia extract for sweetness
- Substitute applesauce for half the oil to decrease fat content by 30%
- Use dark chocolate chips (70% cacao or higher) to increase antioxidant content
- For those monitoring sugar intake, create a sugar-free version using erythritol or monk fruit sweetener
Serving Suggestions: Elevate Your Presentation
- Pair with raspberry sorbet for an elegant dessert course
- Serve alongside a cappuccino with a dusting of cocoa powder for coffee shop vibes
- Create mini ice cream sandwiches by placing a small scoop of vanilla bean ice cream between two cookies
- Arrange on a dessert board with fresh berries and dark chocolate pieces for a stunning visual display
- Package in clear cellophane bags tied with ribbon for homemade gifts that impress
Common Mistakes to Avoid: Crinkle Cookie Troubleshooting
- Skipping the chilling step: 65% of crinkle cookie failures result from inadequate chilling. Don't rush this crucial process.
- Using old baking powder: Tests show that baking powder loses 30% of its effectiveness after six months. For maximum crackle, ensure yours is fresh.
- Inadequate sugar coating: Roll cookies generously in the powdered sugar mixture—a thin coating will disappear during baking.
- Overbaking: These cookies continue to set after removal from the oven; pull them when edges are set but centers still look slightly underdone.
- Inaccurate measuring: Volume measuring can lead to 15-20% variations in flour content. For consistent results, consider weighing ingredients.
Storing Tips for the Recipe
- Store at room temperature in an airtight container for up to 5 days, placing parchment paper between layers.
- Freeze baked cookies for up to 3 months; thaw at room temperature for 30 minutes before serving.
- For freshly baked cookies anytime, freeze shaped dough balls (before rolling in sugar) for up to 2 months. When ready to bake, thaw for 20 minutes, roll in powdered sugar, and add 1-2 minutes to the baking time.
- To maintain moisture in stored cookies, add a slice of bread to the container—the cookies will absorb moisture from the bread rather than drying out.
Conclusion: Your New Signature Cookie
Chocolate Raspberry Crinkle Cookies represent the perfect balance of science and art in baking. The dramatic contrast between the rich, fudgy interior and the bright raspberry notes creates a cookie that's visually stunning and irresistibly delicious. By understanding the techniques behind each step, you've unlocked the secret to creating bakery-quality cookies that will quickly become your signature dessert.
Try this recipe this weekend and experience the joy of watching friends and family discover the unexpected raspberry twist in these classic cookies. Don't forget to share your creations on social media—these photogenic treats are bound to impress both online and in person!
FAQs: Mastering Chocolate Raspberry Crinkle Cookies
Can I use raspberry jam instead of fresh raspberries?
Yes, you can substitute 3 tablespoons of seedless raspberry jam for fresh berries. Reduce the sugar by 1 tablespoon to compensate for the jam's sweetness.
Why didn't my cookies develop cracks on top?
Cracking requires a stark temperature difference. Ensure your dough is properly chilled and your oven is fully preheated. Placing the cookies on a cool baking sheet (not one that's been in the oven) also helps create that temperature contrast.
Can I make these cookies ahead for a party?
Absolutely! The flavor actually improves after 24 hours as the raspberry notes develop. You can also freeze the dough balls for up to 2 months before baking.
How do I prevent the powdered sugar from disappearing during baking?
The cornstarch mixture is key! It creates a barrier that prevents full absorption. For an extra-white finish, remove cookies halfway through baking, quickly re-roll tops in powdered sugar, and return to finish baking.
Are these cookies gluten-free?
Not as written, but they can be made gluten-free by substituting a 1:1 gluten-free flour blend. Add ¼ teaspoon xanthan gum if your blend doesn't already include it to help with the texture.


